The Olympia Dress Two Versions - Love Notions Sewing Patterns
Posted on
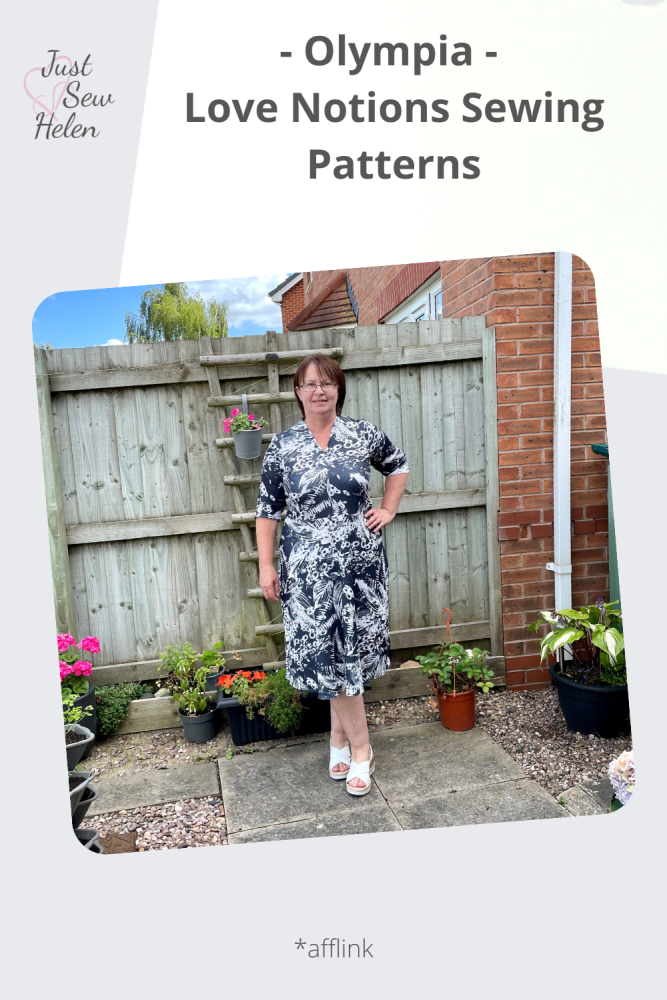
Having made the Olympia dress once before, and being pleased with the result, I was keen to get involved with pattern testing the update. I made two different styles of dress by changing the fabric type and skirt length.
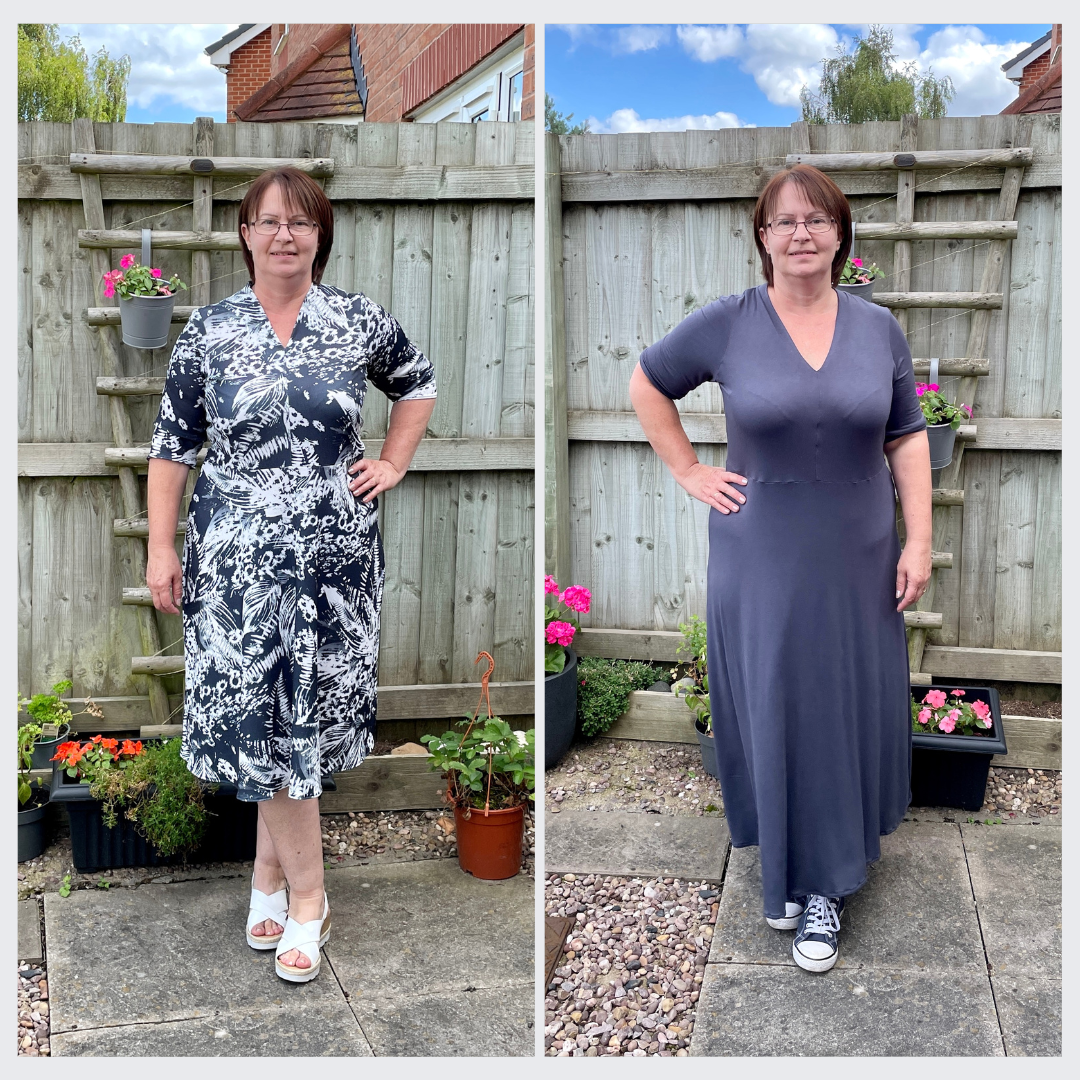
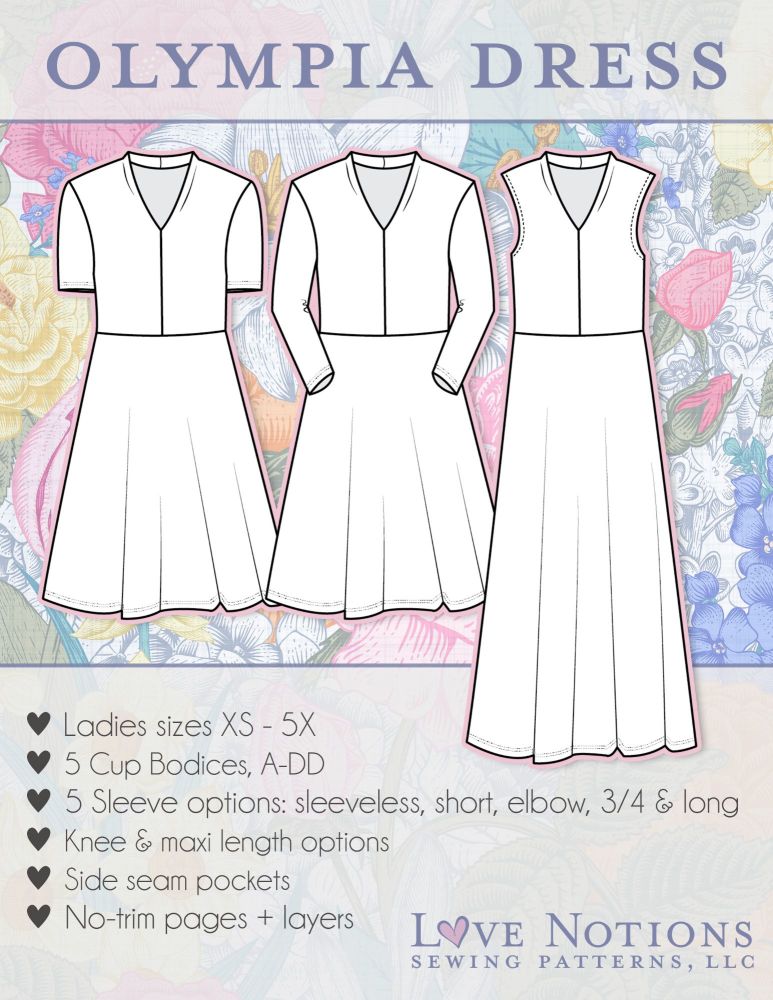
The Olympia features an integrated reverse shawl collar with a v-neck giving it a classy, timeless look. There are five sleeve lengths: sleeveless, short, elbow, 3/4 and long as well as knee or maxi skirt lengths. The bodice is fitted closely over the bust and at the natural waist. Side seam pockets are also included. This dress is meant for light to medium weight knits and the look and fit will change depending on the drape of the fabric. There is also an option to make the Olympia Dress nursing friendly with zipper instructions included in the tutorial. Sizes range from XS-5X and A-DD sewing cup sizes (not the same as bra sizes).
Again, working to a deadline is good for me and luckily we weren’t on holiday at this time, plus I didn’t have many commitments for the two week turnaround, apart from our son turning 18 in the middle!
My measurements are high bust 38.5”, full bust 43”, waist 37” & hips 48” & both dresses were made in a size large, based on the high bust measurement, with a D cup & elbow length sleeves. Instructions are clear & helpful in choosing your size and cup. I omitted the pockets on both dresses as they tend to sit at my widest point and can be a bit unflattering. I’m also unlikely to use pockets in a dress because the weight of my phone would drag the waist down.
I used the overlocker for the majority of the construction and the sewing machine for the neck & hems.
Version 1 was the knee length dress for using a patterned, jersey crepe fabric and included the following alterations –
- graded to XL at the waist
- shortened the bodice by 1”
- lengthened the skirt to below the knee
The fit was great across my shoulders, back, arms & skirt. I had some slight pulling on the side bust and made a note to check this for version 2.
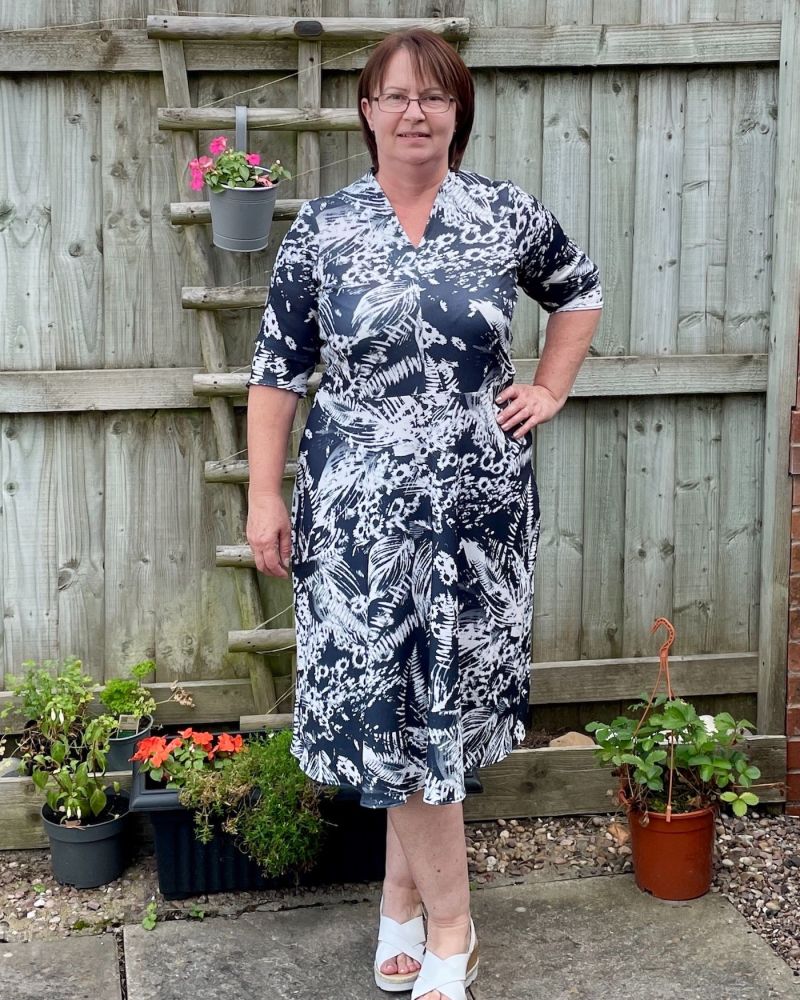
The neck band was a bit loose, partly because the fabric is medium to light weight and I hadn’t reduced the width at the back of the neck as one of my usual alterations. I regularly have to take half to one inch off the top centre back/neck edge on my garments. I also probably need a further ½” off the length of the bodice as it is sitting slightly below my natural waist. Some of these alterations were being addressed by the designer for versions 2 & 3 of the pattern and are included in my second dress.
There are two final adjustments I think I would need, the first is to take out a very small wedge at the armhole (at the point of the marked pattern notches), particularly if making a sleeveless dress. The second is to take in about half in inch at the bottom of the bodice centre front seam. The dress hangs from my bust and this will help the fit between my bust and waist.
To be able to wear this first dress in the future I needed to address the loose back neck band. I considered stitching clear or thin elastic along the top edge of the neckline but thought that it might pucker or be uncomfortable against my skin, particularly clear elastic. Instead, I pulled in the centre back neck seam by tucking it inside itself (is that makes sense?) & secured it with an invisible ladder stitch. I then added two darts, positioned about 2 inches either side, and machine stitched them in place. I’m really pleased with the fit of the neck now and as the fabric is patterned the adjustment is hardly visible. Even on a plain fabric I think it would look ok as long as the darts are symmetrical.
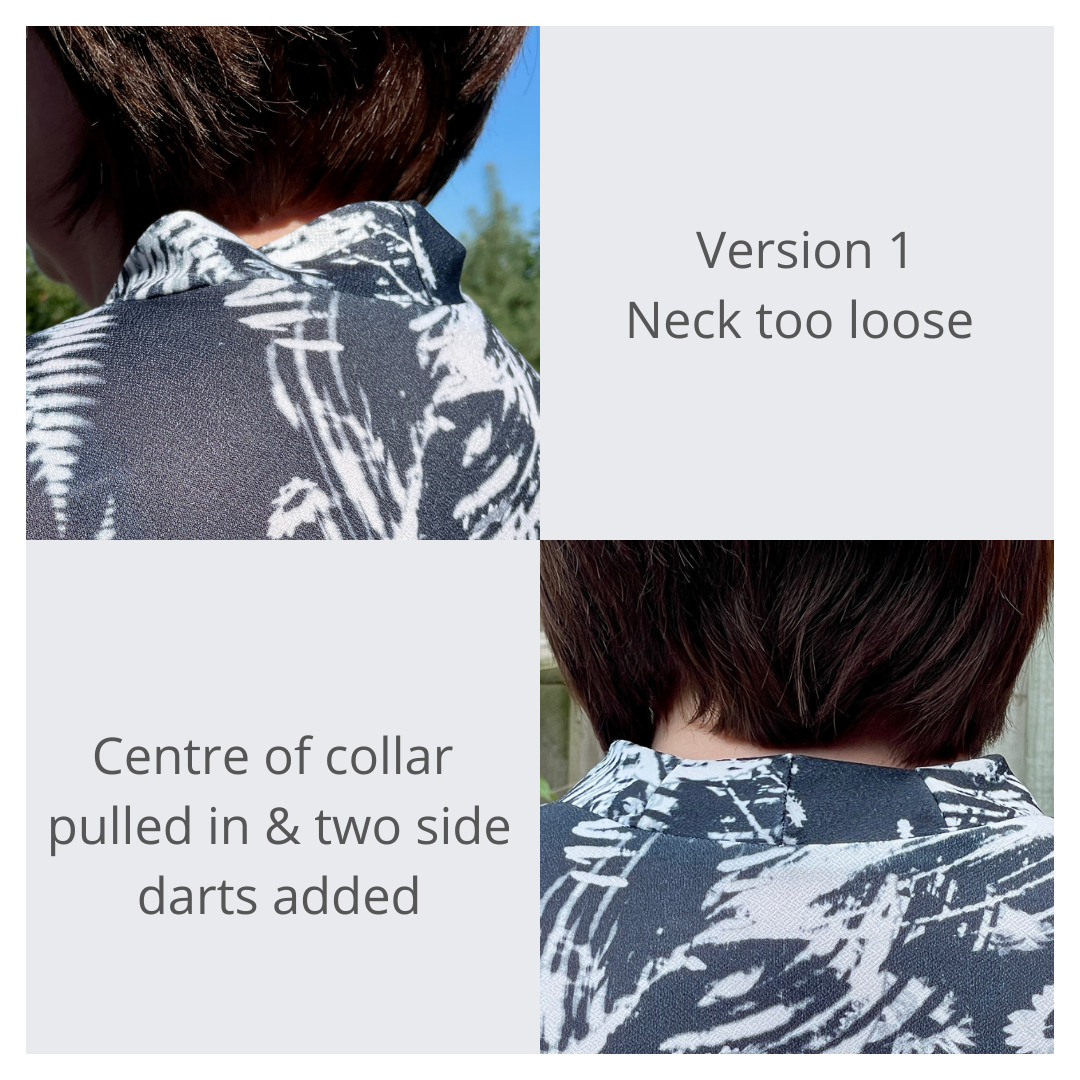
My personal preference for the front neckline is to lower the V about an inch and this was also the consensus of other testers and the designer, and was one of the amendments for the final version.
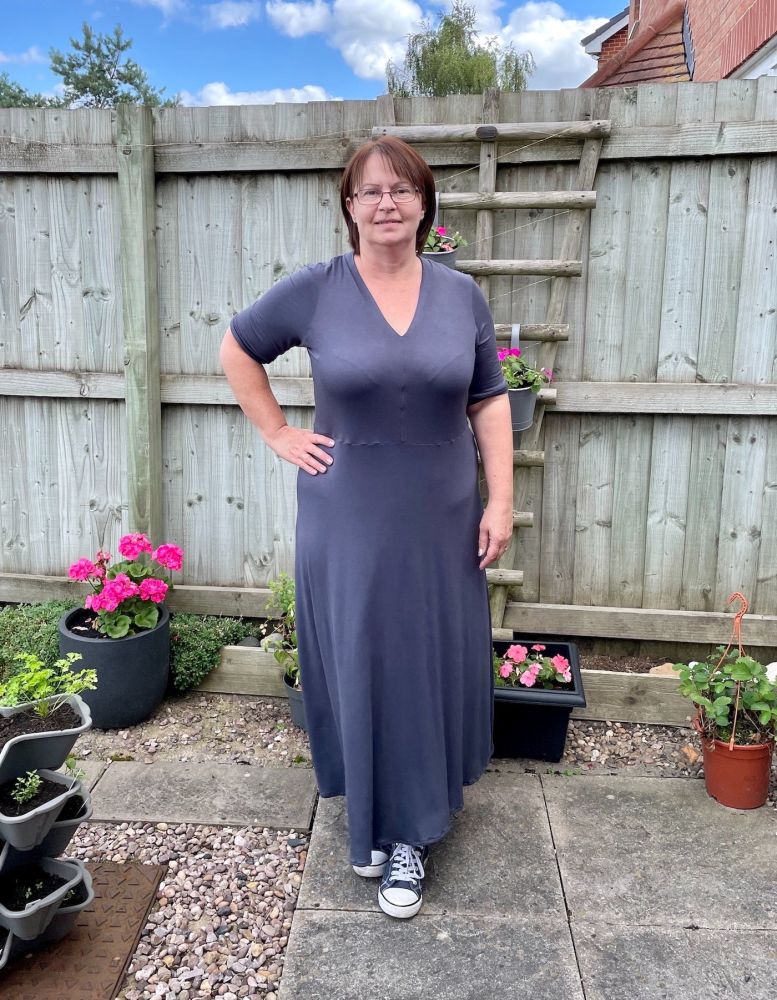
My second dress, maxi length, was made using a viscose jersey fabric although in hindsight the fabric is a bit too lightweight for my lumps and bumps! I bought both fabrics from an online auction site and it can be difficult to judge the weight and drape of fabrics.
The final version of the pattern gave a much better fit overall and I only had to include my usual pattern adjustments to get a great fit. For this version I -
- graded to XL at the waist
- shortened the bodice by a further 0.5” due to the weight of the fabric
- shortened the maxi skirt to ankle length approx. 3” (personal preference)
- shortened the neck a further 1.5cm at the centre seam partly due to the stretchy fabric & as my usual alteration.
I’m very pleased with the fit but my 2nd fabric choice wasn’t the best, although it is very comfy & wearing a camisole under might smooth out the drape of the fabric.
You can see my first Olympia in this post.
There are many lovely fabric styles on the Love Notions site showcasing different fabric choices plus using two different fabrics, one for the bodice and another for the skirt. This dress is so versatile being suitable for every day casual wear and also for occasion wear by choosing a more quality fabric than I have used. The dress suits all shapes and sizes.
For my next Olympia, & in fact all garments I make, I must trust the finished measurements detailed by the designer, as I probably didn’t need to grade out at the waist this time. Obviously, it will depend on the stretch of the fabric but I had to take in extra at the waist on both dresses. My mindset is that it is easier to take in a garment rather than be left with something that is too small to adjust & most independent pattern designers provide very accurate finished garment measurements.
---------------------------------------------------------------
* Post contains affiliate links*
---------------------------------------------------------------
---------------------------------------------------------------

Add a comment: